
Codex
Configure OpenAI Codex CLI to use OpenModel as its API provider via CC-Switch
Overview
Codex is OpenAI's official CLI coding agent. It runs in your terminal and can understand your codebase, propose changes, write code, and execute commands -- all powered by OpenAI models. By routing Codex through OpenModel, you gain access to a unified API gateway that supports multiple model providers, consolidated billing, and the ability to use models from different providers without managing separate API keys.
This guide walks you through configuring Codex to use OpenModel as its API provider using CC-Switch, a visual configuration manager for CLI coding tools.
Client benefits
Selected models may offer Codex-specific availability or pricing. Complete this setup and use Codex normally; eligible benefits are applied automatically. See Client Benefits for details.
Prerequisites
Before you begin, make sure you have:
- OpenModel API key -- You need a valid API key from OpenModel. If you don't have one yet, follow the Authentication guide to create your API key.
- CC-Switch installed -- CC-Switch is the tool used to configure API providers for Codex. If you haven't installed it yet, follow the CC-Switch Setup guide first.
- Node.js -- Codex requires Node.js (version 22 or later) to run. If you don't have Node.js installed, download it from nodejs.org and install the LTS version before proceeding.
Tip
You can verify your Node.js installation by opening a terminal and running node --version. If the command returns a version number (e.g., v22.x.x), Node.js is ready.
Configure CC-Switch for Codex
In this section, you will add an OpenModel provider configuration for Codex inside CC-Switch. This tells Codex to send its API requests to OpenModel instead of directly to OpenAI.
Open the Codex Provider Tab
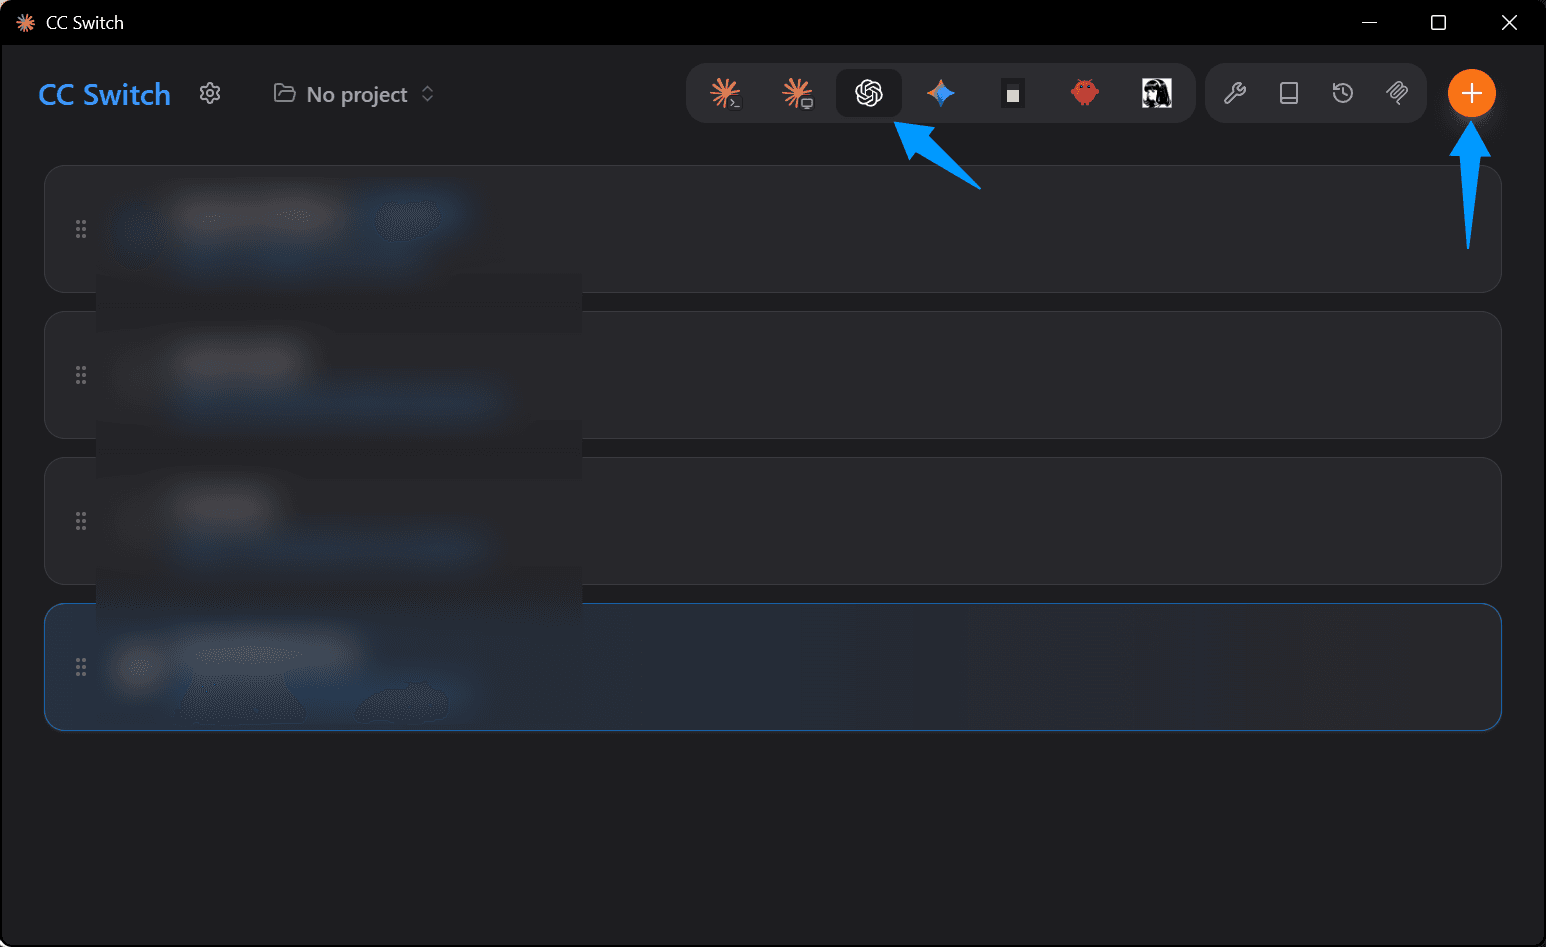
Launch CC-Switch and look at the tabs in the top-right area of the window. Click the Codex tab to switch to the Codex provider configuration view. Then click the orange Add button in the top-right corner to create a new provider entry.
Tip
If you don't see the Codex tab, make sure you are running the latest version of CC-Switch. Check the CC-Switch Releases page for updates.
Configure the Provider Settings
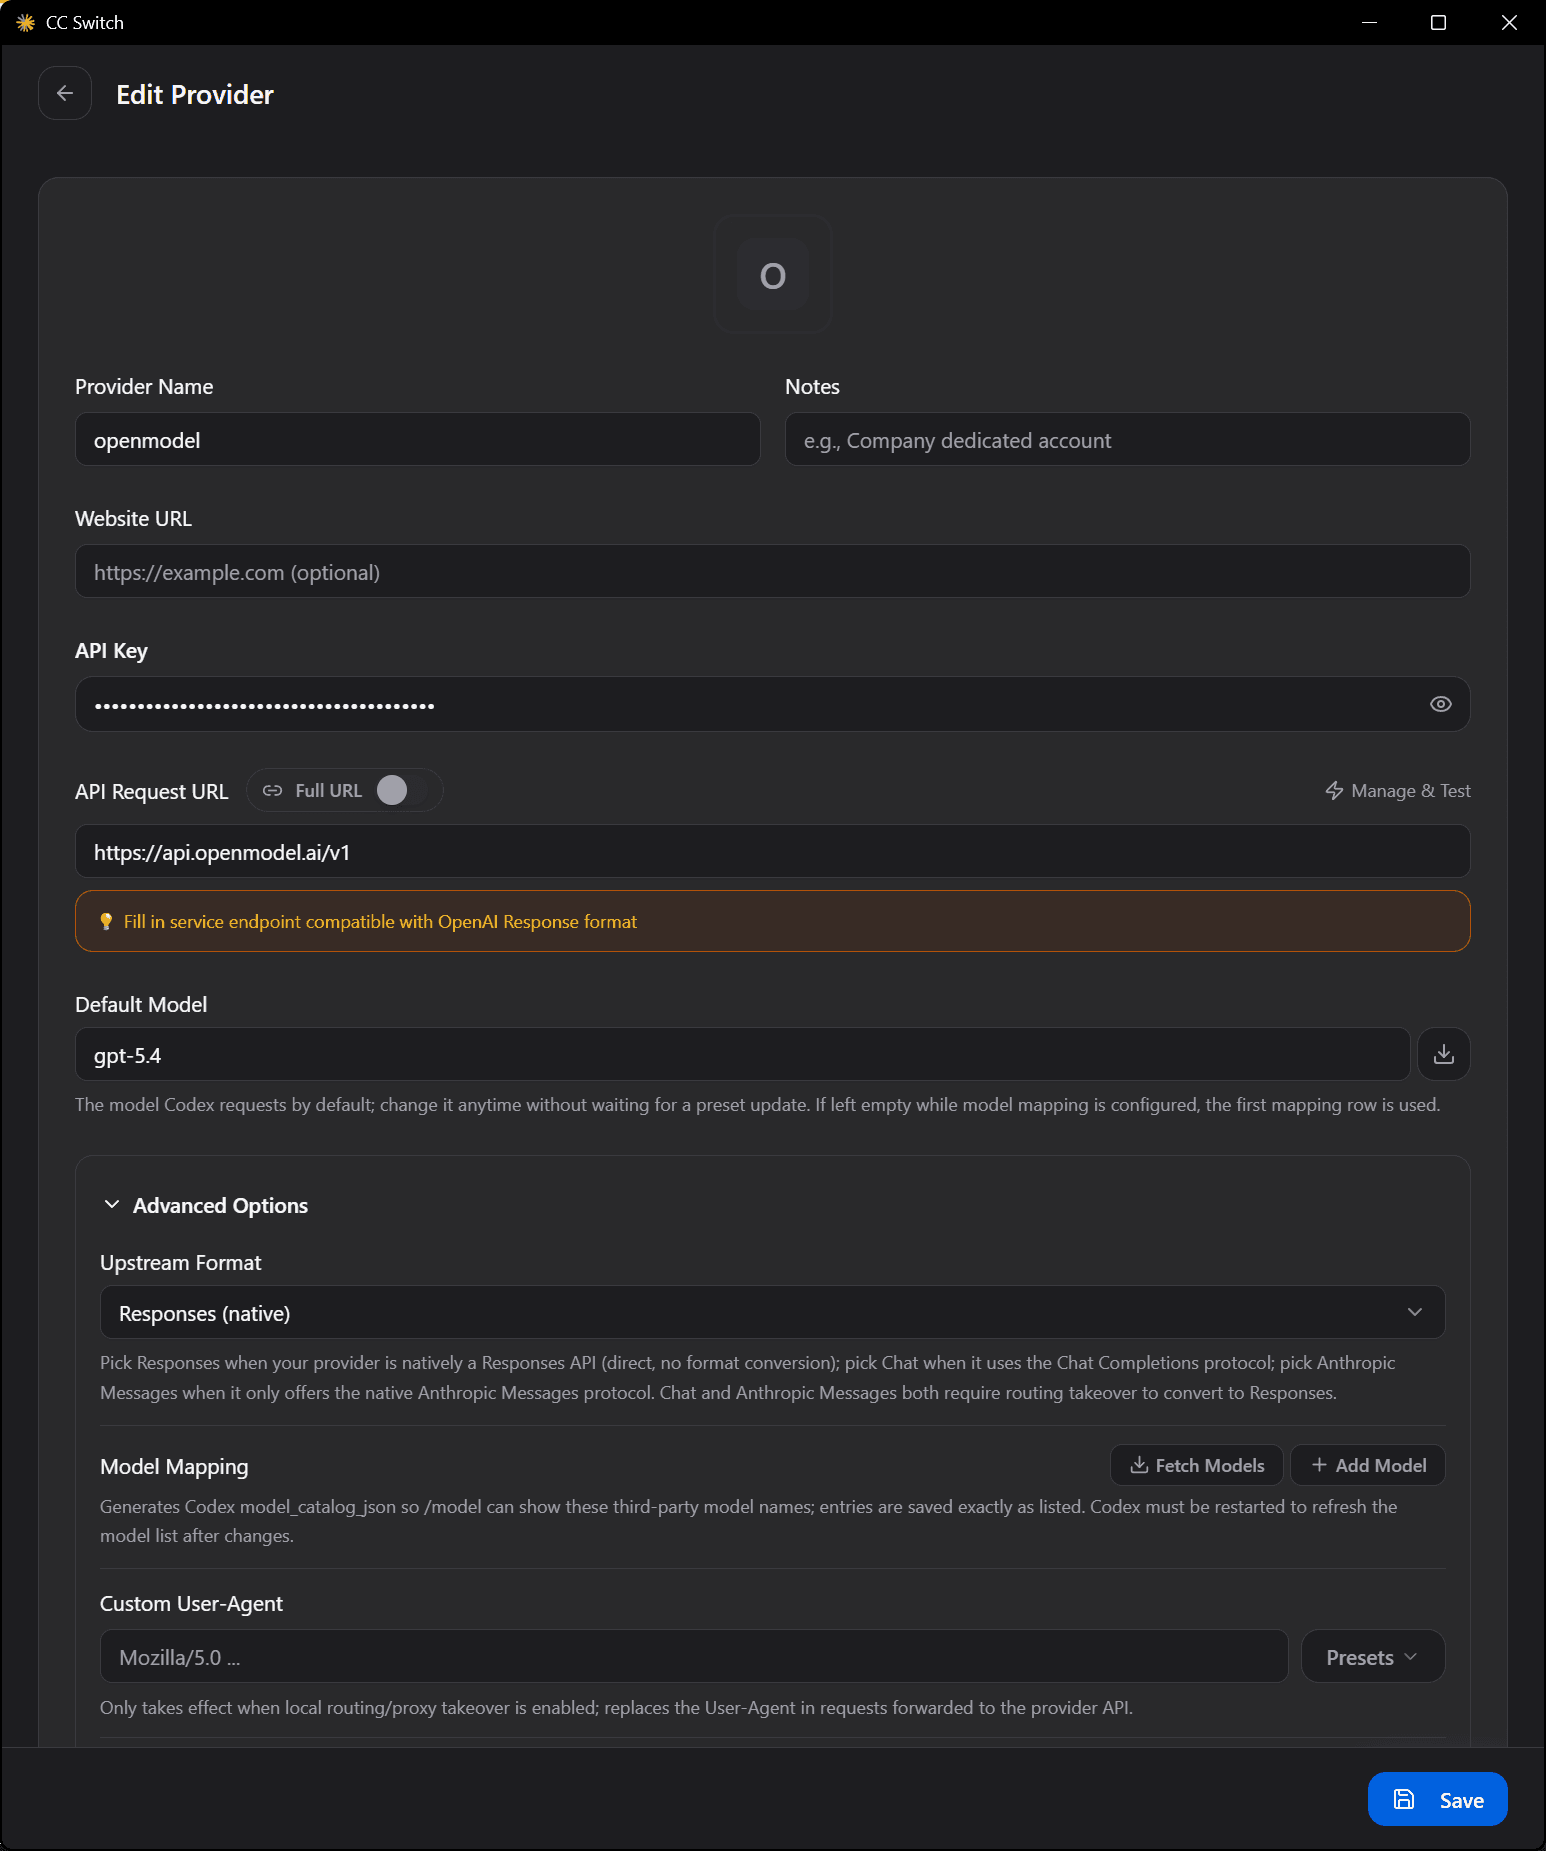
On the Add New Provider page, scroll down to the editor area. Fill in the configuration fields as follows:
- API Key -- Enter your OpenModel API key (the one starting with
om-that you created in the Authentication guide). Do not use your OpenAI API key here -- the goal is to route requests through OpenModel. - Default Model -- Choose the model you want Codex to use by default. You can enter any model available through OpenModel (e.g.,
gpt-5.4,o3, or other supported models). See Available Models for the full list of models you can use.
Once all fields are filled in, click the blue Save button at the bottom of the page to save your configuration.
Tip
If you are unsure which model to choose for the Default Model, gpt-5.4 is a good general-purpose choice. You can always change it later by editing the provider configuration in CC-Switch.
Tip
Double-check that you have entered your API key correctly. A common mistake is to include extra spaces before or after the key. Copy-paste the key directly from the OpenModel Console to avoid typos.
Install Codex
If you haven't installed Codex yet, follow the official installation instructions:
- Visit the Codex CLI Getting Started guide on the ChatGPT Learn site.
- Follow the instructions to install Codex globally using npm:
npm install -g @openai/codexTip
If you encounter permission errors during installation on macOS or Linux, try running the command with sudo: sudo npm install -g @openai/codex. On Windows, make sure your terminal (CMD or PowerShell) is running as Administrator.
- After installation, verify that Codex is installed correctly by running:
codex --versionIf the command prints a version number, the installation was successful.
Launch Codex
Now that CC-Switch is configured and Codex is installed, you can launch Codex and verify that everything is working.
Open a Terminal in Your Project Folder
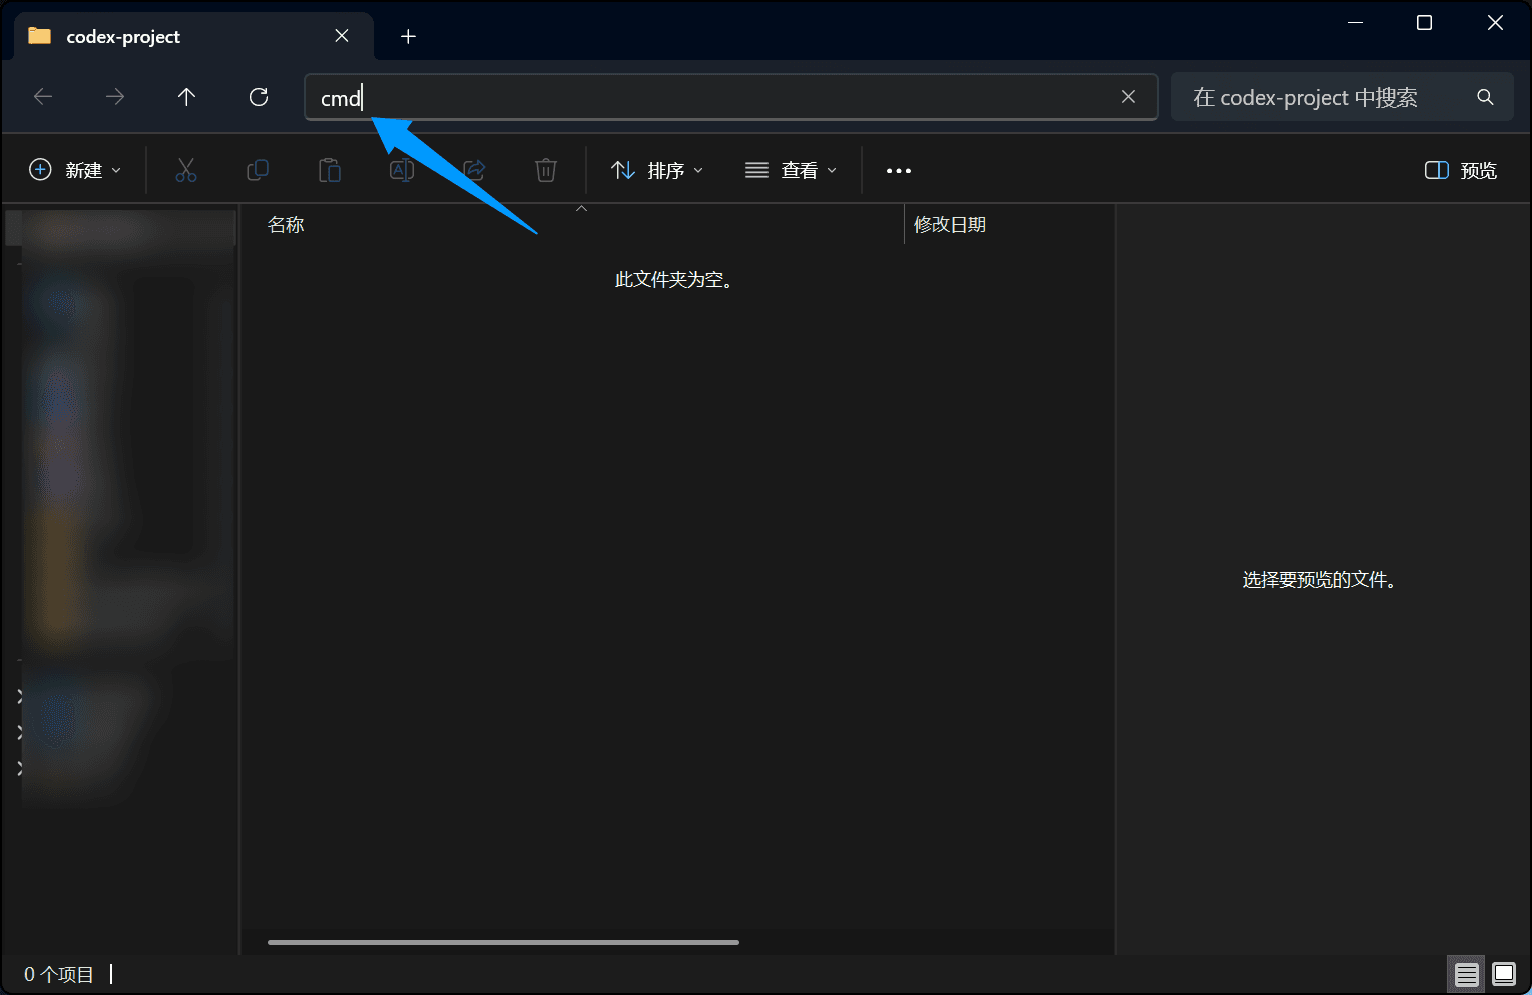
Navigate to the project folder where you want to use Codex. Open a Command Prompt (CMD), PowerShell, or your preferred terminal in that directory.
Tip
On Windows, you can open CMD in a specific folder by navigating to it in File Explorer, clicking the address bar, typing cmd, and pressing Enter.
Verify Configuration
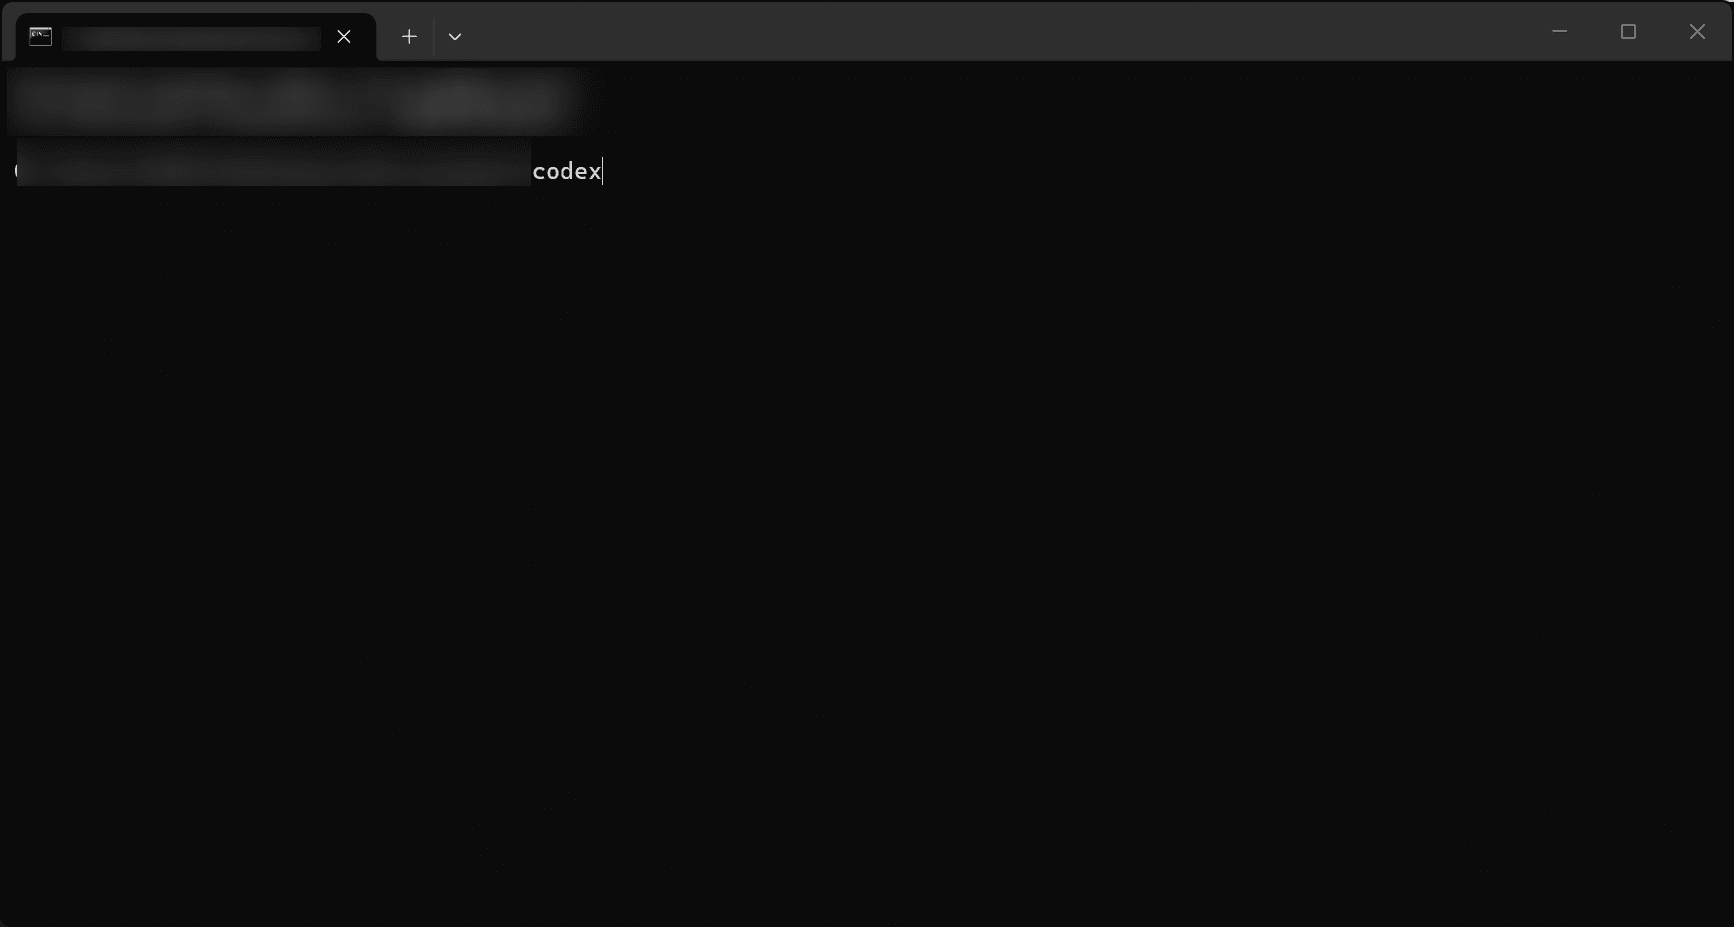
If everything is configured correctly, Codex will start up and display its interactive interface, ready to accept your instructions. The screen should look similar to the following:
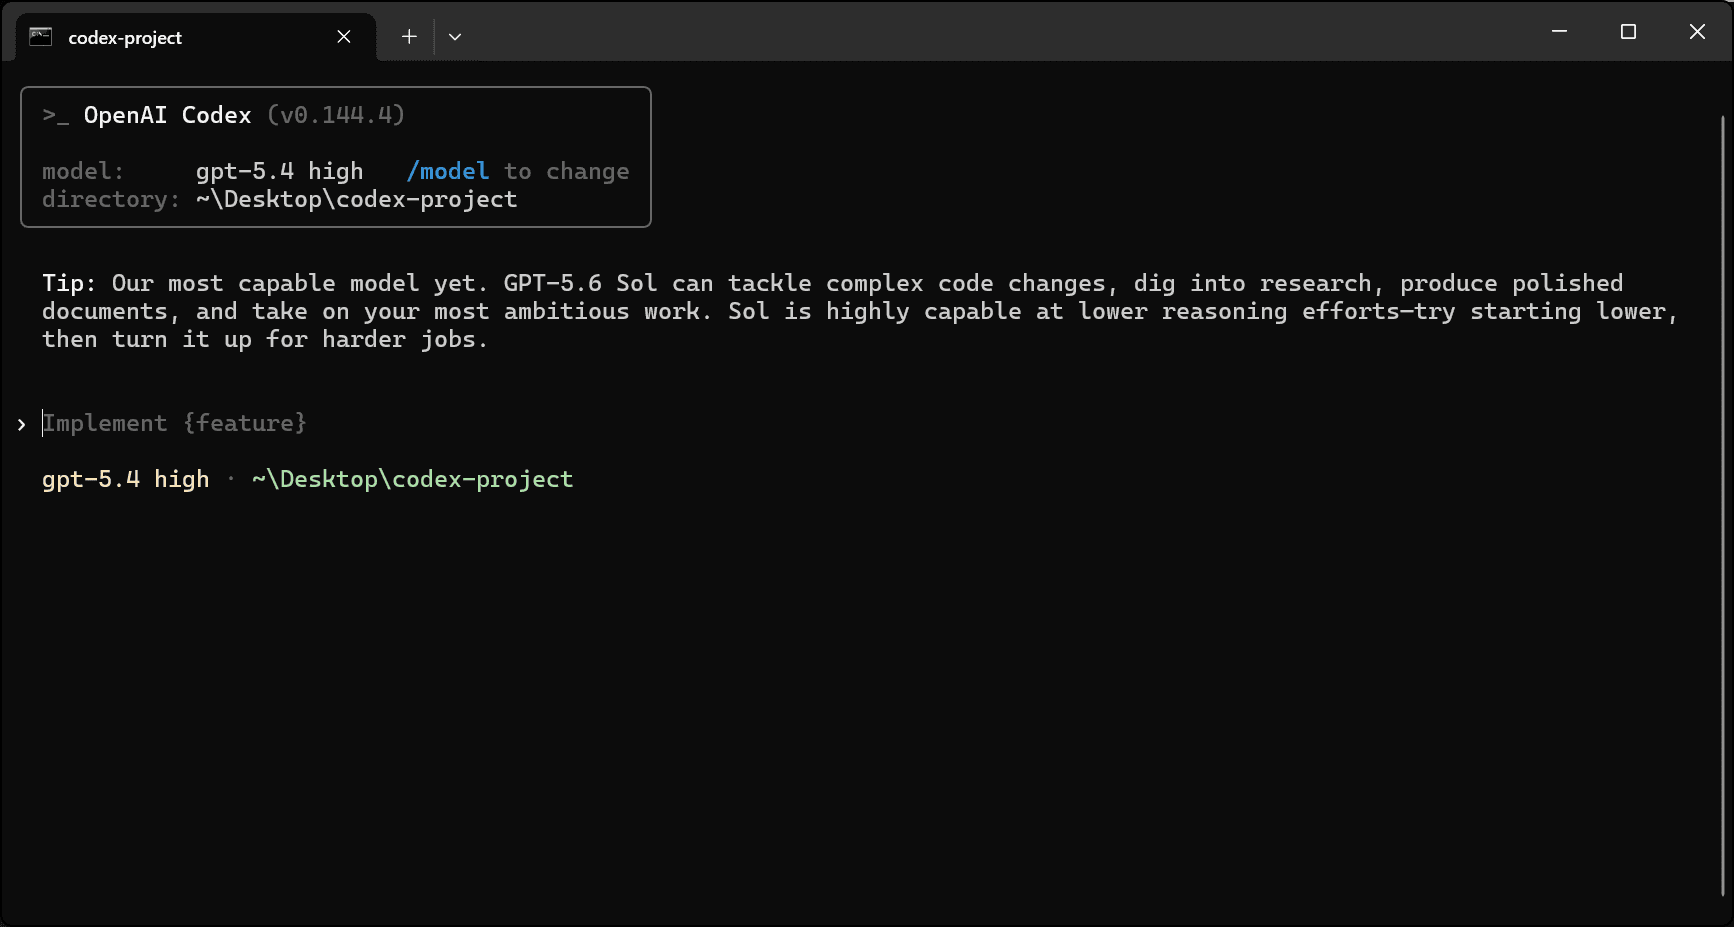
If you see this interface, your configuration is complete. Codex is now routing its API requests through OpenModel.
Troubleshooting
Codex fails to start or shows an authentication error
- Check your API key -- Open CC-Switch, go to the Codex tab, and verify that the API key is correct. Make sure it starts with
om-and has no extra spaces. - Check CC-Switch is applied -- After saving a configuration in CC-Switch, make sure the provider entry is active (selected). Then close and reopen your terminal so the environment variables take effect.
"command not found: codex"
- Make sure Codex is installed globally via npm (
npm install -g @openai/codex). - Make sure Node.js and npm are in your system's PATH. Try running
node --versionandnpm --versionto confirm. - If you just installed Node.js, close and reopen your terminal to refresh the PATH.
Codex starts but uses the wrong model
- Open CC-Switch, go to the Codex tab, and check the Default Model setting. Change it to the model you want (e.g.,
gpt-5.4) and save. - Restart Codex after making changes in CC-Switch.
Codex shows network or timeout errors
- Verify that your network can reach
api.openmodel.ai. Try runningcurl https://api.openmodel.aiin your terminal. - If you are behind a corporate firewall or proxy, make sure
api.openmodel.aiis allowed. - Check the OpenModel Status page for any ongoing service disruptions.
Next Steps
- Available Models -- Browse all models accessible through OpenModel, including models from OpenAI, Anthropic, Google, DeepSeek, and more.
- Claude Code -- Configure Claude Code, Anthropic's CLI coding agent, to work with OpenModel.
- Gemini CLI -- Configure Google's Gemini CLI to work with OpenModel.
- Streaming -- Learn how to use streaming responses with your coding tools.
- Billing -- Understand how usage and billing work across all your integrated tools.