
Gemini CLI
Configure Gemini CLI to use OpenModel as an API provider via CC-Switch
Overview
Gemini CLI is Google's official command-line tool for interacting with Gemini models directly from your terminal. It enables developers to chat with Gemini, generate code, analyze files, and integrate AI assistance into their command-line workflows without leaving the terminal.
By routing Gemini CLI through OpenModel, you get several advantages:
- Unified billing -- Use your single OpenModel API key to access Gemini models alongside Claude, GPT, DeepSeek, and other providers, all billed to one account.
- Model flexibility -- Switch between different models (including non-Gemini models) without reconfiguring your tool.
- Simplified key management -- No need to create and manage a separate Google AI API key.
This guide walks you through configuring Gemini CLI to use OpenModel as its API provider using CC-Switch.
Prerequisites
Before you begin, make sure you have:
- OpenModel API Key -- You need an active API key from your OpenModel account. If you don't have one yet, follow the Authentication guide to create your API key.
- CC-Switch -- CC-Switch must be installed on your Windows PC. If you haven't installed it yet, follow the CC-Switch Setup guide to download and install it.
- Node.js -- Gemini CLI requires Node.js (version 18 or later) to be installed on your system. If you don't have Node.js installed, download it from nodejs.org before proceeding.
Configure CC-Switch for Gemini CLI
CC-Switch manages the environment variables that Gemini CLI uses to connect to API providers. In this section, you will create a new provider configuration that points Gemini CLI to the OpenModel API gateway.
Open the Gemini CLI Tab
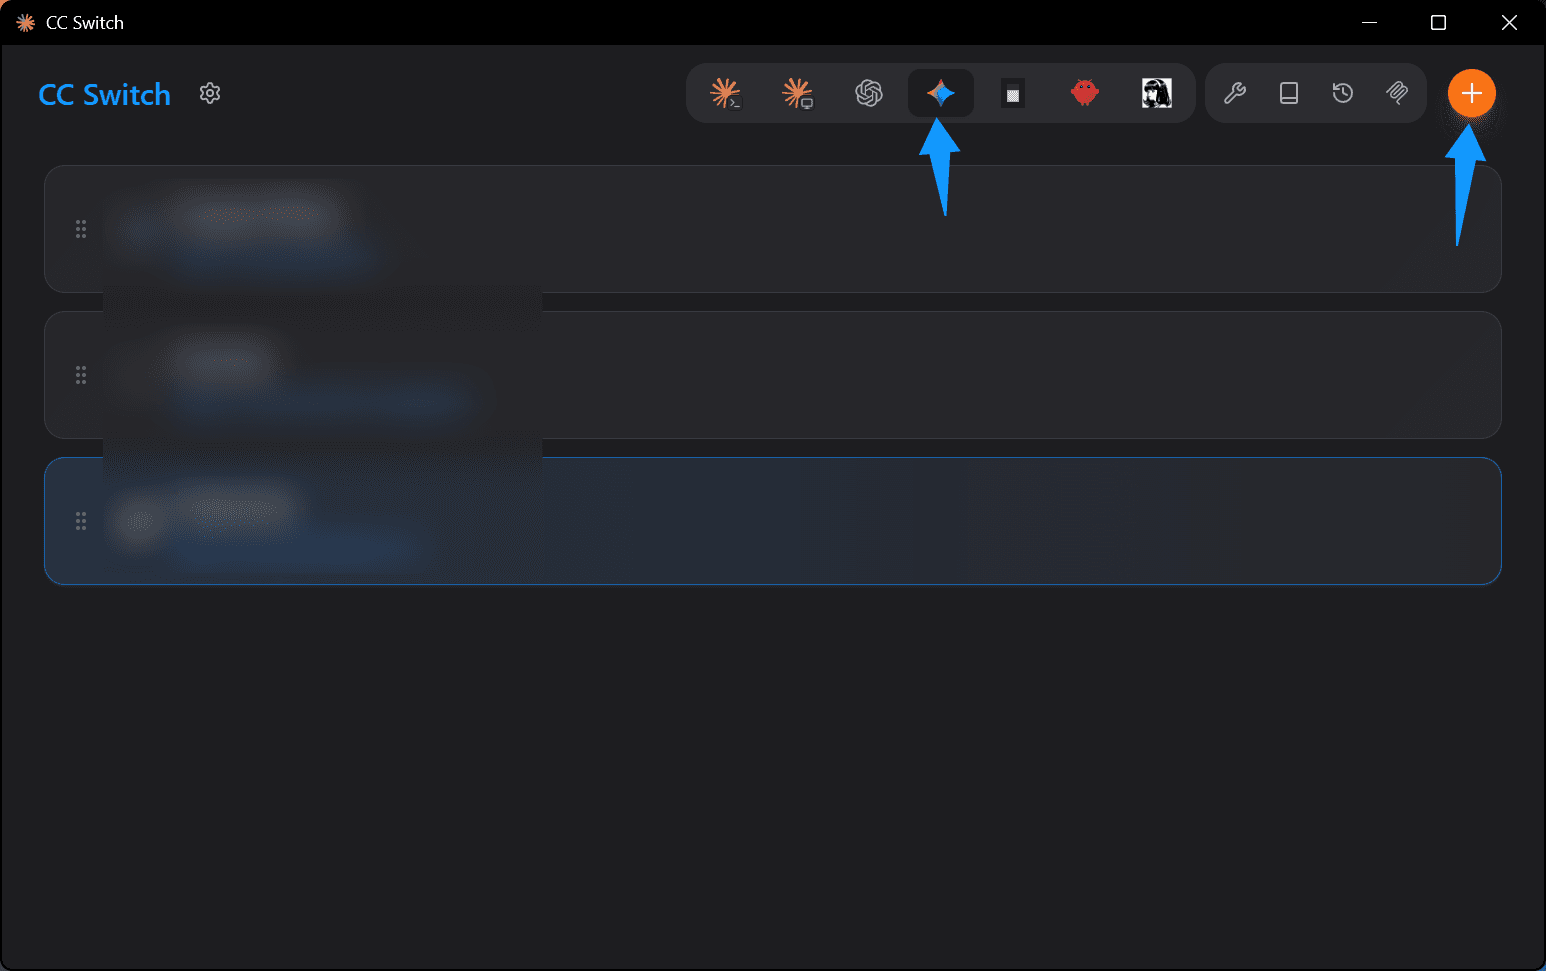
Launch CC-Switch on your desktop. In the top-right area of the interface, click the Gemini CLI tab to switch to the Gemini CLI provider configuration view. Then click the orange Add button to create a new provider entry.
Configure the Provider
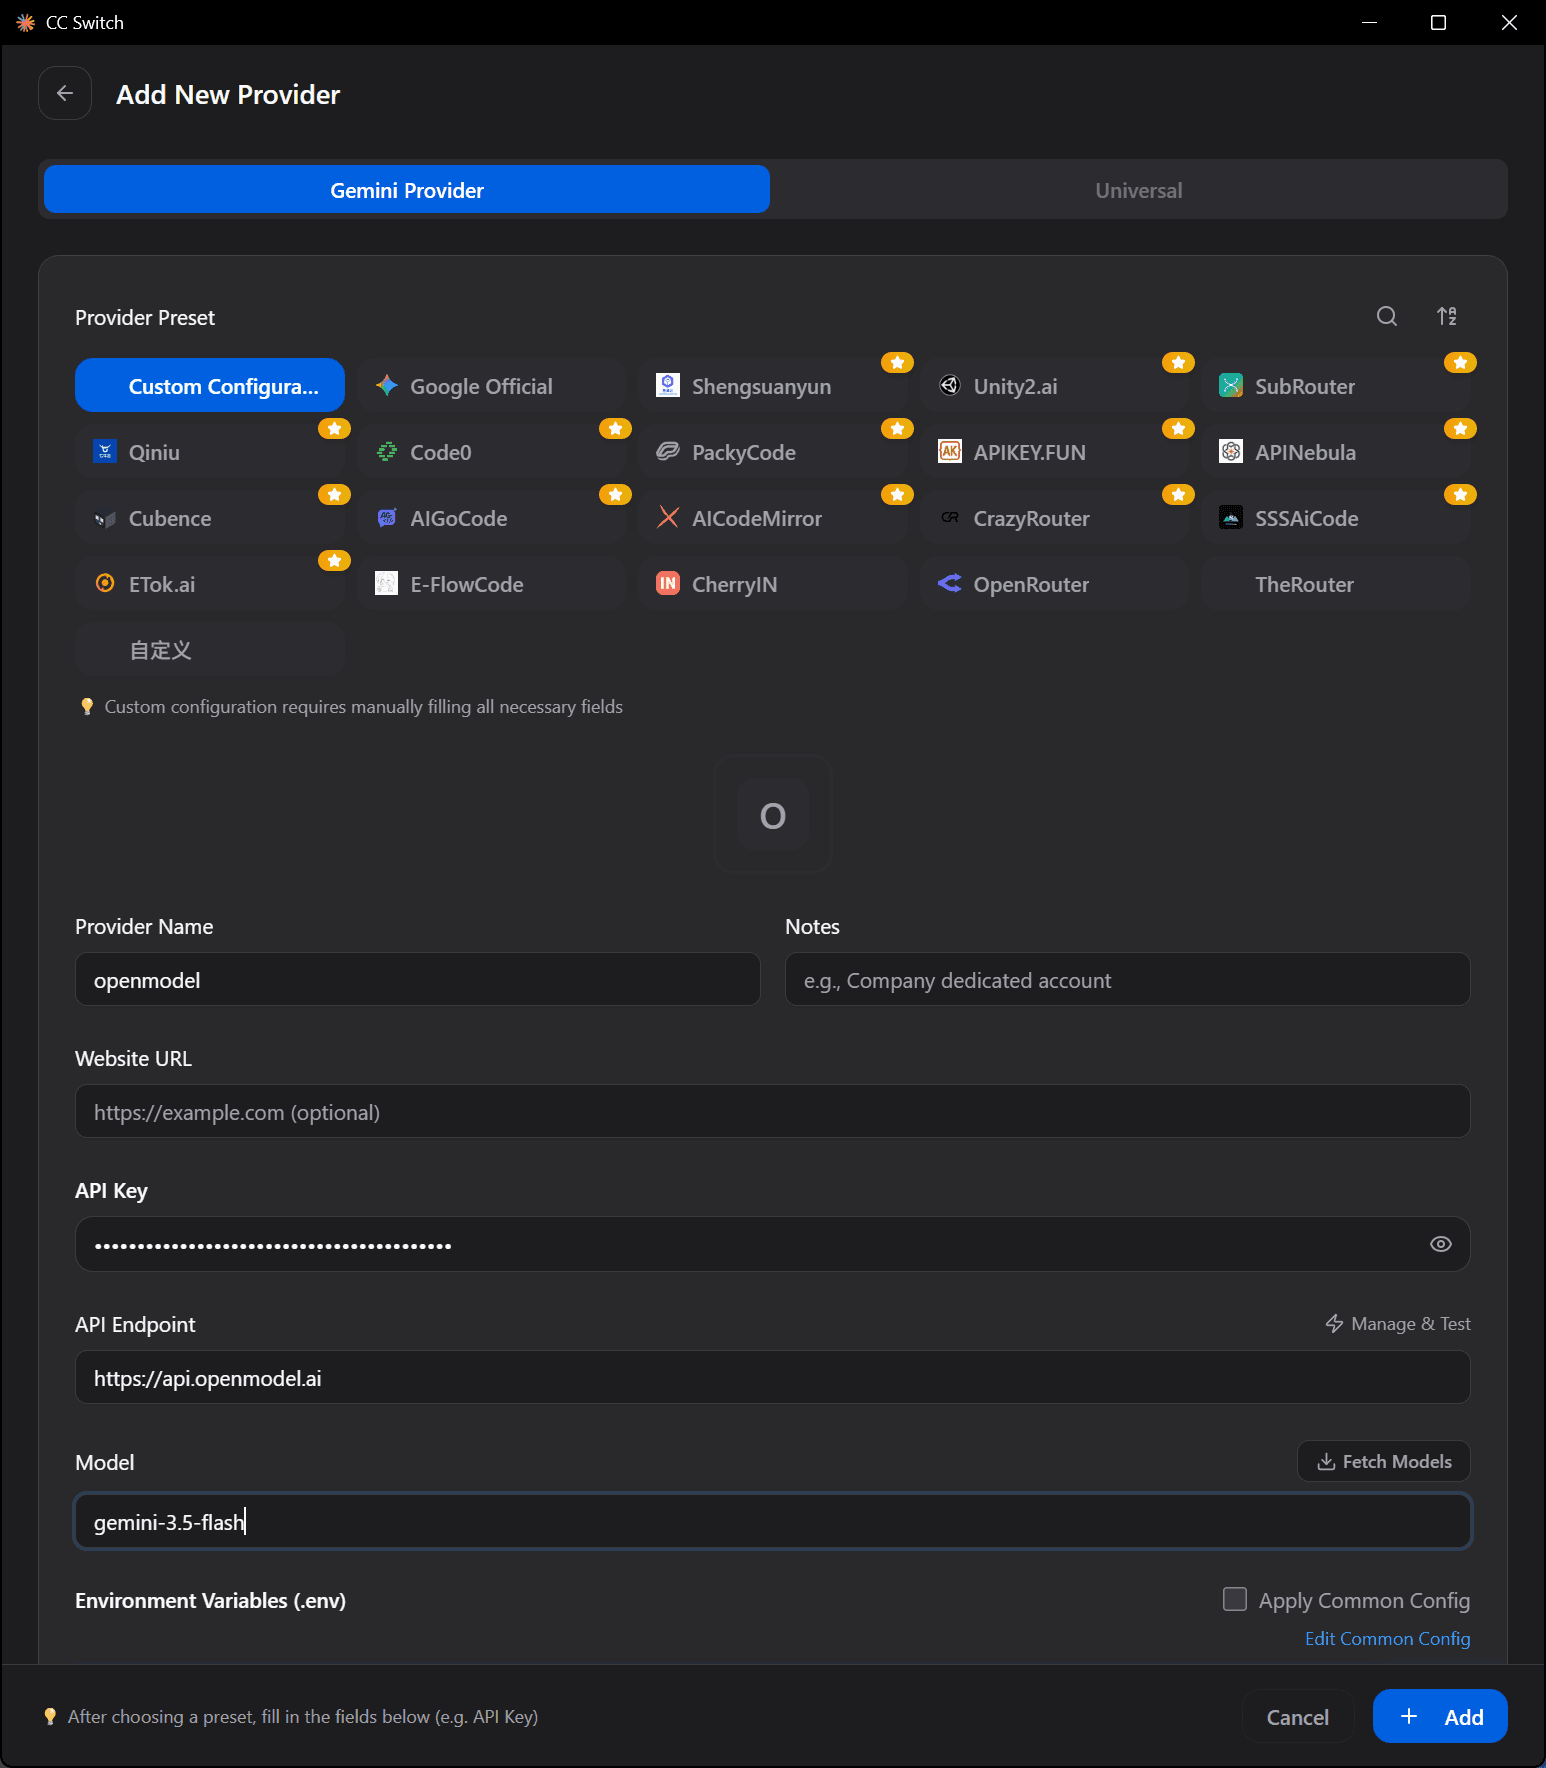
On the Add New Provider page, scroll down to the editor area. Fill in the following fields:
- API Key -- Enter your OpenModel API key (starts with
om-). This is the key you created in the Authentication guide. - Model -- Enter the model name you want to use by default. You can use any model available on OpenModel, such as
gemini-3.5-flashorgemini-3.1-pro-preview. See Available Models for the full list of supported models.
After filling in all fields, click the blue Save button at the bottom of the page to save your configuration.
Tip
You can create multiple provider configurations in CC-Switch (for example, one for OpenModel and one for a direct Google AI key) and switch between them at any time without re-entering credentials.
Verifying Your Configuration
After saving, your new provider entry should appear in the Gemini CLI provider list within CC-Switch. Make sure it is selected (active) before launching Gemini CLI.
If you need to edit your configuration later, click on the provider entry in CC-Switch to modify the API key, model, or other settings.
Install Gemini CLI
If you already have Gemini CLI installed, you can skip this section and go directly to Launch Gemini CLI.
Check Node.js
Gemini CLI requires Node.js version 18 or later. Open a terminal and run the following command to check whether Node.js is installed and which version you have:
node --versionYou should see output like v20.18.0 or higher. If the command is not recognized or the version is below 18, download and install the latest LTS version from nodejs.org.
Tip
After installing Node.js, you may need to close and reopen your terminal (or restart your computer) for the node and npm commands to be recognized.
Install via npm
Once Node.js is ready, install Gemini CLI globally using npm:
npm install -g @anthropic-ai/gemini-cliAlternatively, you can follow the official installation instructions at the Gemini CLI documentation for platform-specific guidance.
Launch Gemini CLI
With CC-Switch configured and Gemini CLI installed, you are ready to start using it.
Open a Terminal in Your Project Folder
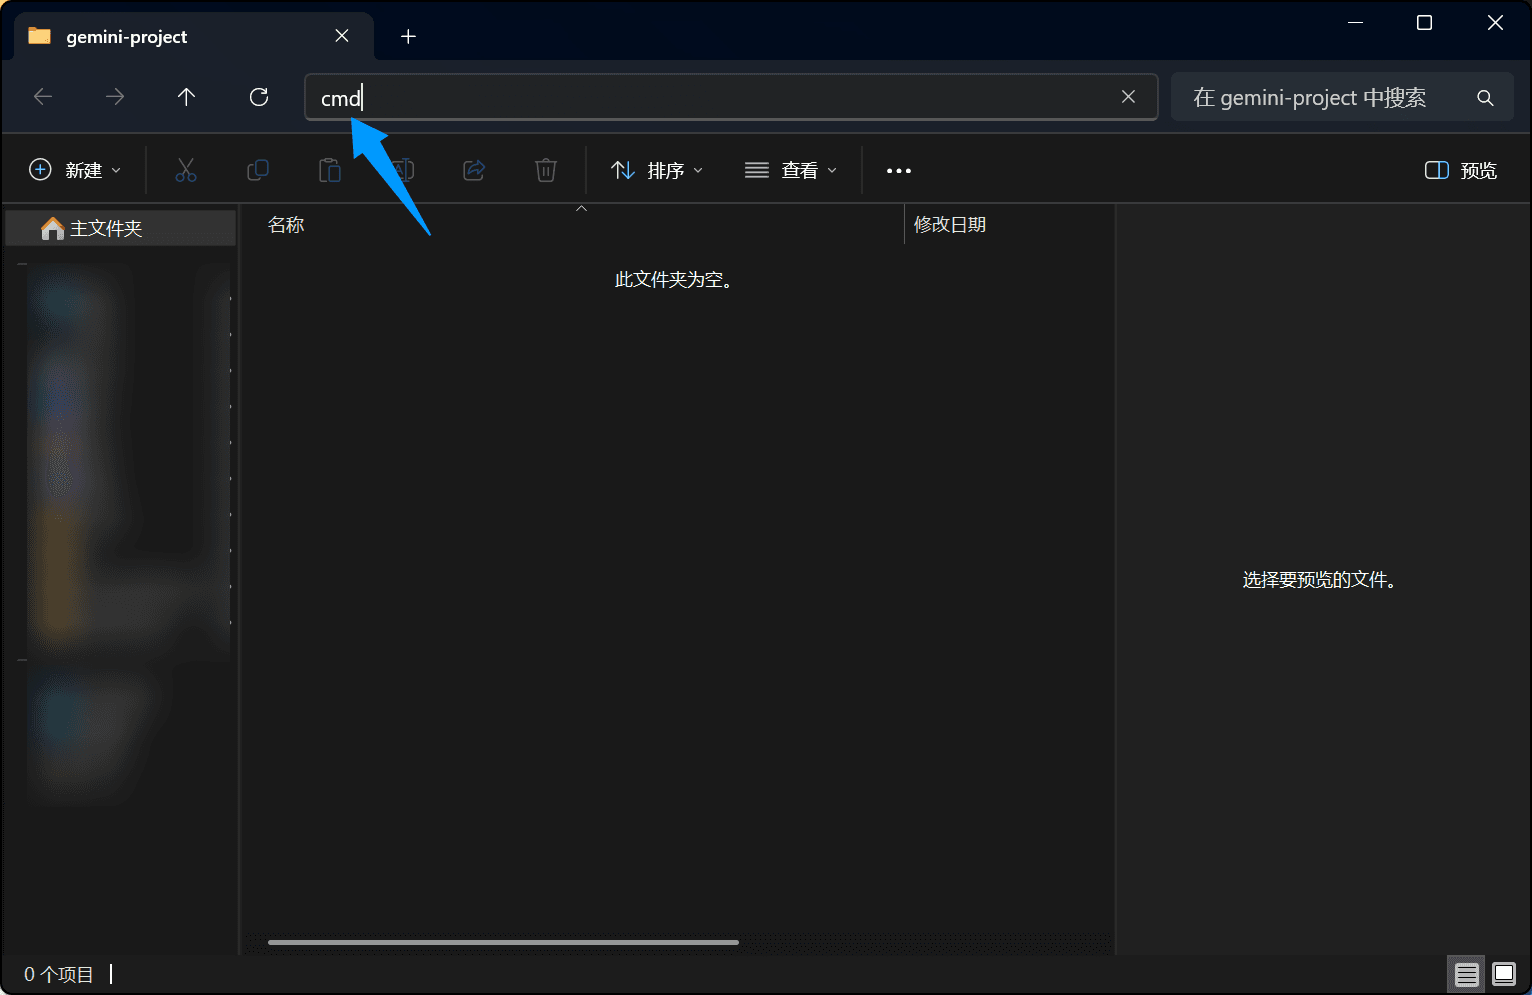
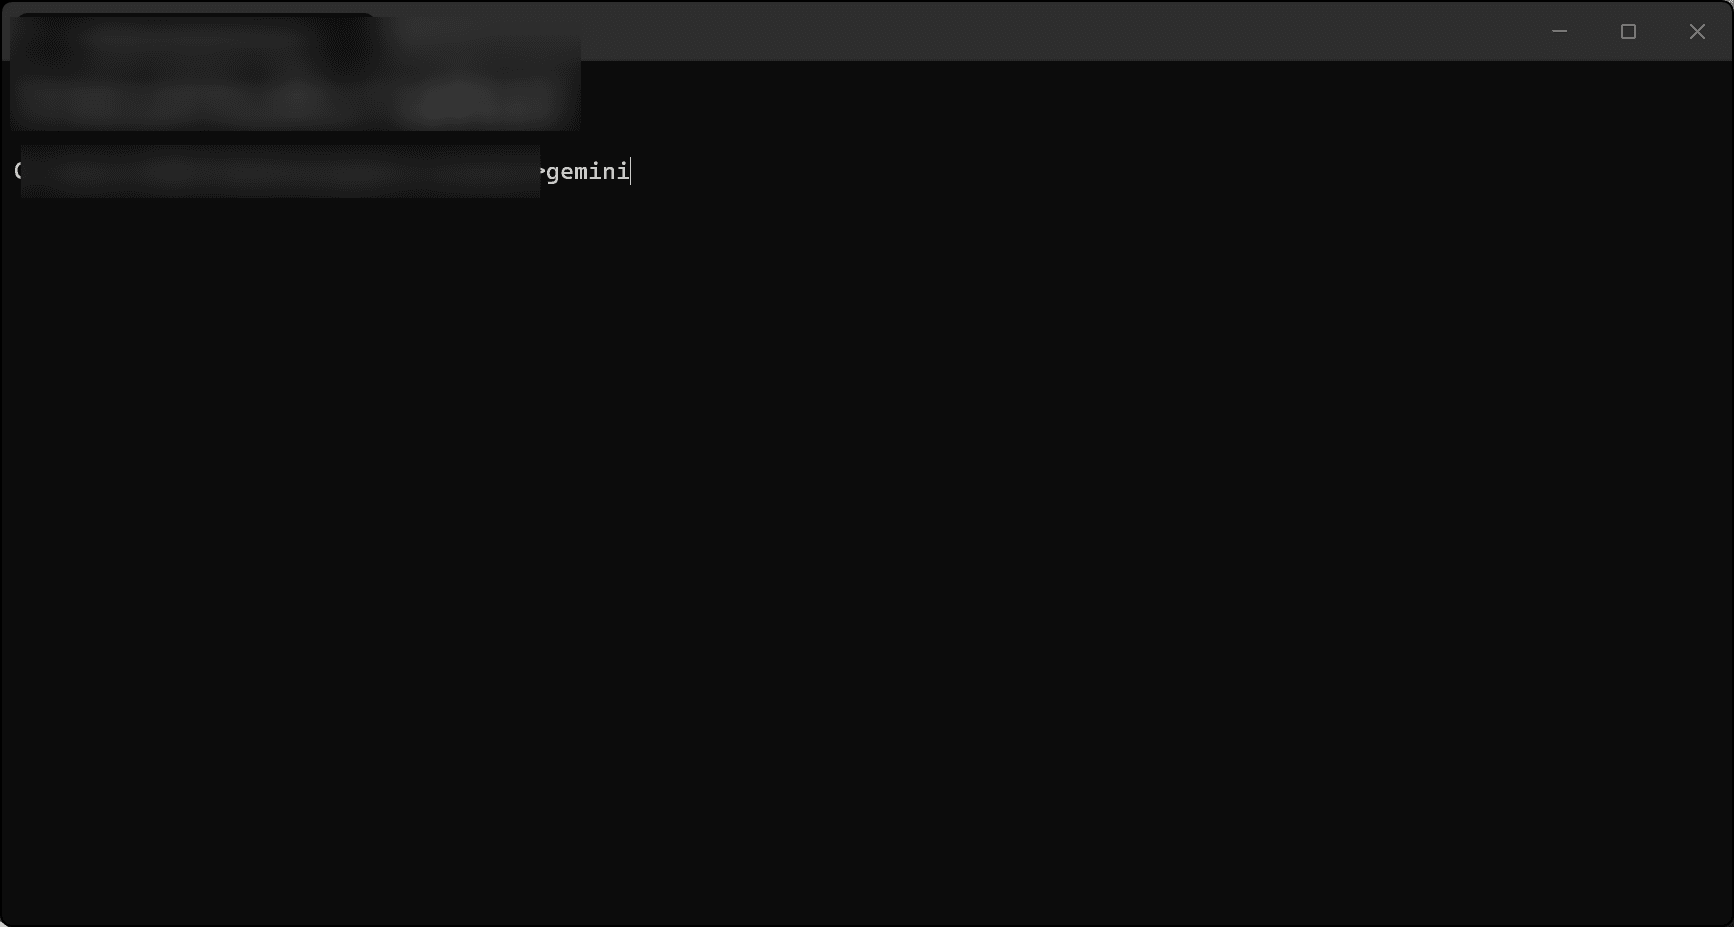
Navigate to the project folder where you want to use Gemini CLI. Open a command prompt (CMD) or terminal window in that directory. You can do this by:
- Typing
cmdin the Windows Explorer address bar while inside the project folder, then pressing Enter. - Right-clicking inside the folder and selecting "Open in Terminal" (Windows 11) or "Open command window here" (Windows 10).
Verify Configuration
If everything is configured correctly, Gemini CLI will start up and display an interactive prompt where you can begin typing questions or commands. You should see output similar to the following:
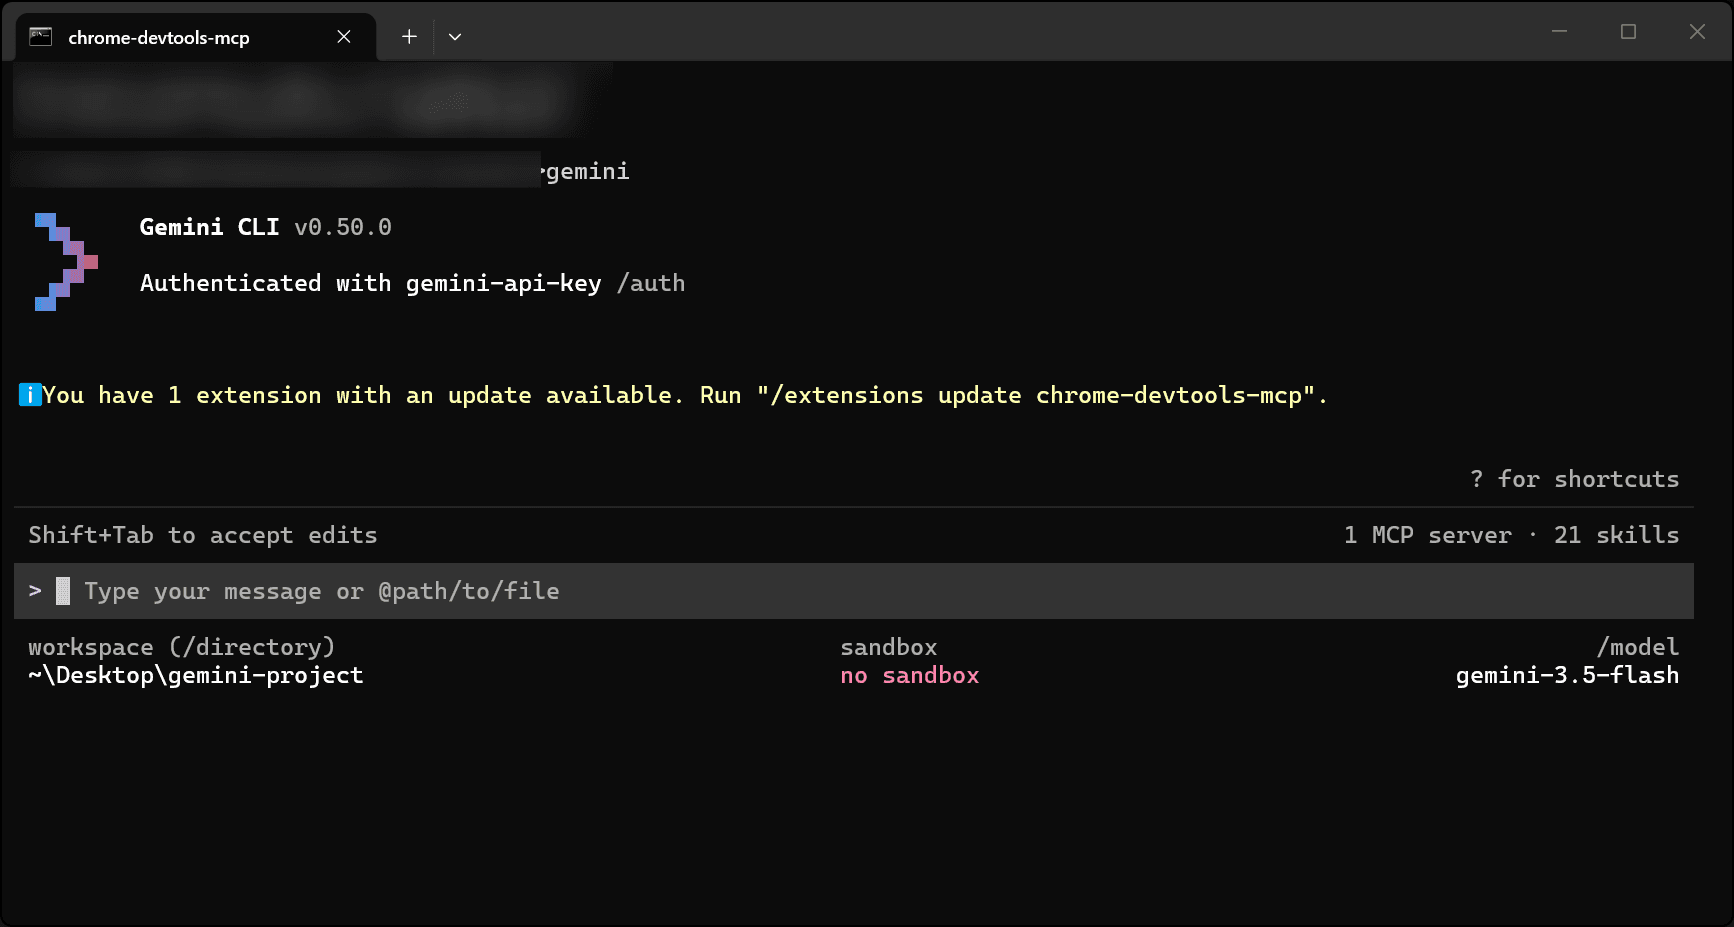
If you see this interface, your configuration is complete. Gemini CLI is now routing its API calls through OpenModel.
Troubleshooting
gemini command not found
Symptom: Gemini CLI is not installed globally, or your system PATH does not include the npm global binaries directory.
Solution:
- Verify the installation by running
npm list -g @anthropic-ai/gemini-cli. If it is not listed, reinstall withnpm install -g @anthropic-ai/gemini-cli. - Make sure your npm global bin directory is in your system PATH. Run
npm config get prefixto find the directory, then add itsbin(or root on Windows) folder to your PATH environment variable. - Close and reopen your terminal after making PATH changes.
node or npm command not found
Symptom: Node.js is not installed, or the installer did not add it to your system PATH.
Solution:
- Download and install Node.js from nodejs.org.
- During installation, make sure the "Add to PATH" option is checked.
- After installation, close all terminal windows and open a new one, then try
node --versionagain. - If the problem persists after installation, restart your computer.
npm permission errors during installation
Symptom: On some systems, installing global npm packages requires elevated permissions.
Solution:
- Windows: Open your terminal (CMD or PowerShell) as Administrator by right-clicking and selecting "Run as administrator", then run the install command again.
- macOS / Linux: Prefix the command with
sudo:sudo npm install -g @anthropic-ai/gemini-cli.
Authentication error or "Invalid API key"
Symptom: The API key configured in CC-Switch is incorrect, expired, or has not been applied to the environment.
Solution:
- Open CC-Switch and verify that the correct API key is entered in your Gemini CLI provider configuration. The key should start with
om-. - Make sure the provider entry is selected (active) in CC-Switch.
- Close your terminal and reopen it to pick up the updated environment variables set by CC-Switch.
- If the key was recently created, verify it works by testing with a simple cURL request as shown in the Quickstart guide.
Connection timeout or network error
Symptom: The OpenModel API server is unreachable, possibly due to network issues, firewall rules, or a proxy configuration.
Solution:
- Check that you can reach
https://api.openmodel.aifrom your terminal by runningcurl https://api.openmodel.ai. - If you are behind a corporate firewall or VPN, ensure that outbound HTTPS traffic to
api.openmodel.aiis allowed. - If you use an HTTP proxy, configure the
HTTPS_PROXYenvironment variable accordingly.
Gemini CLI starts but shows unexpected model or behavior
Symptom: The model name configured in CC-Switch may not be valid, or CC-Switch environment variables may not have been applied to the current terminal session.
Solution:
- Double-check the model name in your CC-Switch configuration against the Available Models page.
- Close all terminal windows and reopen them after making changes in CC-Switch, so the environment variables are refreshed.
Next Steps
- Available Models -- Browse all supported models across providers to find the best fit for your use case
- Claude Code -- Configure Claude Code to use OpenModel as its API provider
- Codex -- Configure Codex to use OpenModel as its API provider
- Quickstart -- Learn how to make API calls directly using SDKs and cURL